Read-only table
1. Creating a read-only table
In the Amalgama Platform, table creation happens in two stages: first you configure the builder, then you call the create() method to instantiate the table.
The builder is returned by the static method Tables.readonly().
Read-only tables are constructed using the Table class.
Here is how we can create a simple table displaying cars with the required configuration:
List<Car> cars = new ArrayList<>();
Table<Car> table = Tables
  .readonly(cars) // required! List objects shown in the table
  .parent(parent) // required! Specifies the parent container where the table will be placed
  .create();
Here is what the optional configuration chain looks like. All other methods are optional and can be specified in any order.
-
checkbox()- adds a checkbox column for row selection. The column is placed in the first position
Table<Car> table = Tables
  .readonly(cars)
  .parent(parent)
  .checkbox() // rows can now be selected via checkboxes
  .create();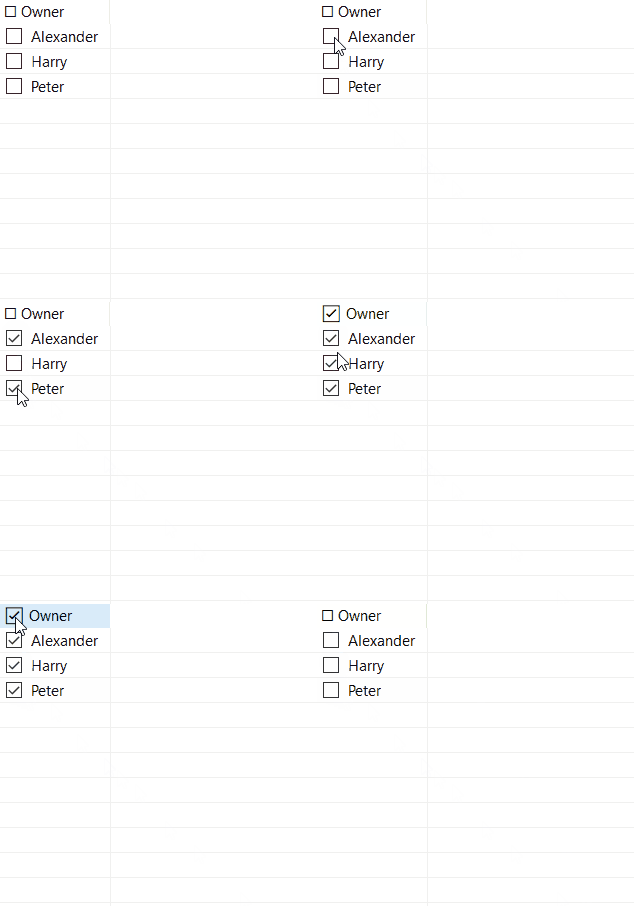
-
rowHeader()- adds a special-purpose column positioned first. This column allows users to select an entire row with a single click. It becomes essential when every other column in the table is editable — without a dedicated selection column, clicking any cell would trigger editing, making row selection impossible.
Table<Car> table = Tables
  .readonly(cars)
  .parent(parent)
  .rowHeader()
  .create();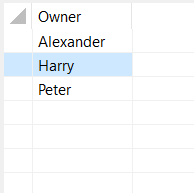
If both checkbox() and rowHeader() are specified, rowHeader becomes the first column and checkbox becomes the second.
-
style(int style)- sets additional SWT styles for the table. You can pass one or more constants from the SWT class, combining them with the bitwise OR operator|. These styles are then passed to the parentTableViewer, where they are interpreted and determine exactly how the table will be rendered
2. Table class API overview
2.1. Selection handling
-
getFirstSelectedRowIndex()- returns the index of the first selected row, or -1 if no row is selected
int selectedIndex = table.getFirstSelectedRowIndex();
if (selectedIndex != -1) {
    Car selectedCar = table.getItem(selectedIndex);
}-
setSelectedRowIndex(int rowIndex)- programmatically selects the row at the specified index
table.setSelectedRowIndex(3); // selects the fourth row-
addSelectedItemChangedHandler(Consumer<T> handler)- sets a consumer to handle selection change events
table.setSelectionChangedConsumer(event -> {
    IStructuredSelection selection = (IStructuredSelection) event.getSelection();
    Car selectedCar = (Car) selection.getFirstElement();
    System.out.println("Selected: " + selectedCar);
});-
removeSelectedItemChangedHandler(Consumer<T> handler)- removes a previously added selection change handler
2.2. Checkbox functionality
-
getCheckedItems()- returns a list of all checked items -
checkItems(List<T> items)- checks the specified items (handlers are not called by default) -
checkItems(List<T> items, boolean callHandlers)- checks the specified items with the option to trigger handlers -
checkAllItems(boolean callHandlers)- checks all items in the table -
uncheckAllItems(boolean callHandlers)- unchecks all items in the table -
setMaxCheckedItemsCount(int maxCheckedItemsCount)- sets the maximum number of items that can be checked simultaneously -
addCheckedItemsChangedHandler(Consumer<List<T>> handler)- adds a handler that is called when the set of checked items changes -
removeCheckedItemsChangedHandler(Consumer<List<T>> handler)- removes a previously added checked items change handler
2.3. Double-Click handling
-
addDoubleClickHandler(BiConsumer<T, DoubleClickEvent> handler)- adds a handler that is called when a row is double-clicked -
removeDoubleClickHandler(BiConsumer<T, DoubleClickEvent> handler)- removes a previously added double-click handler
2.4. Context menu
-
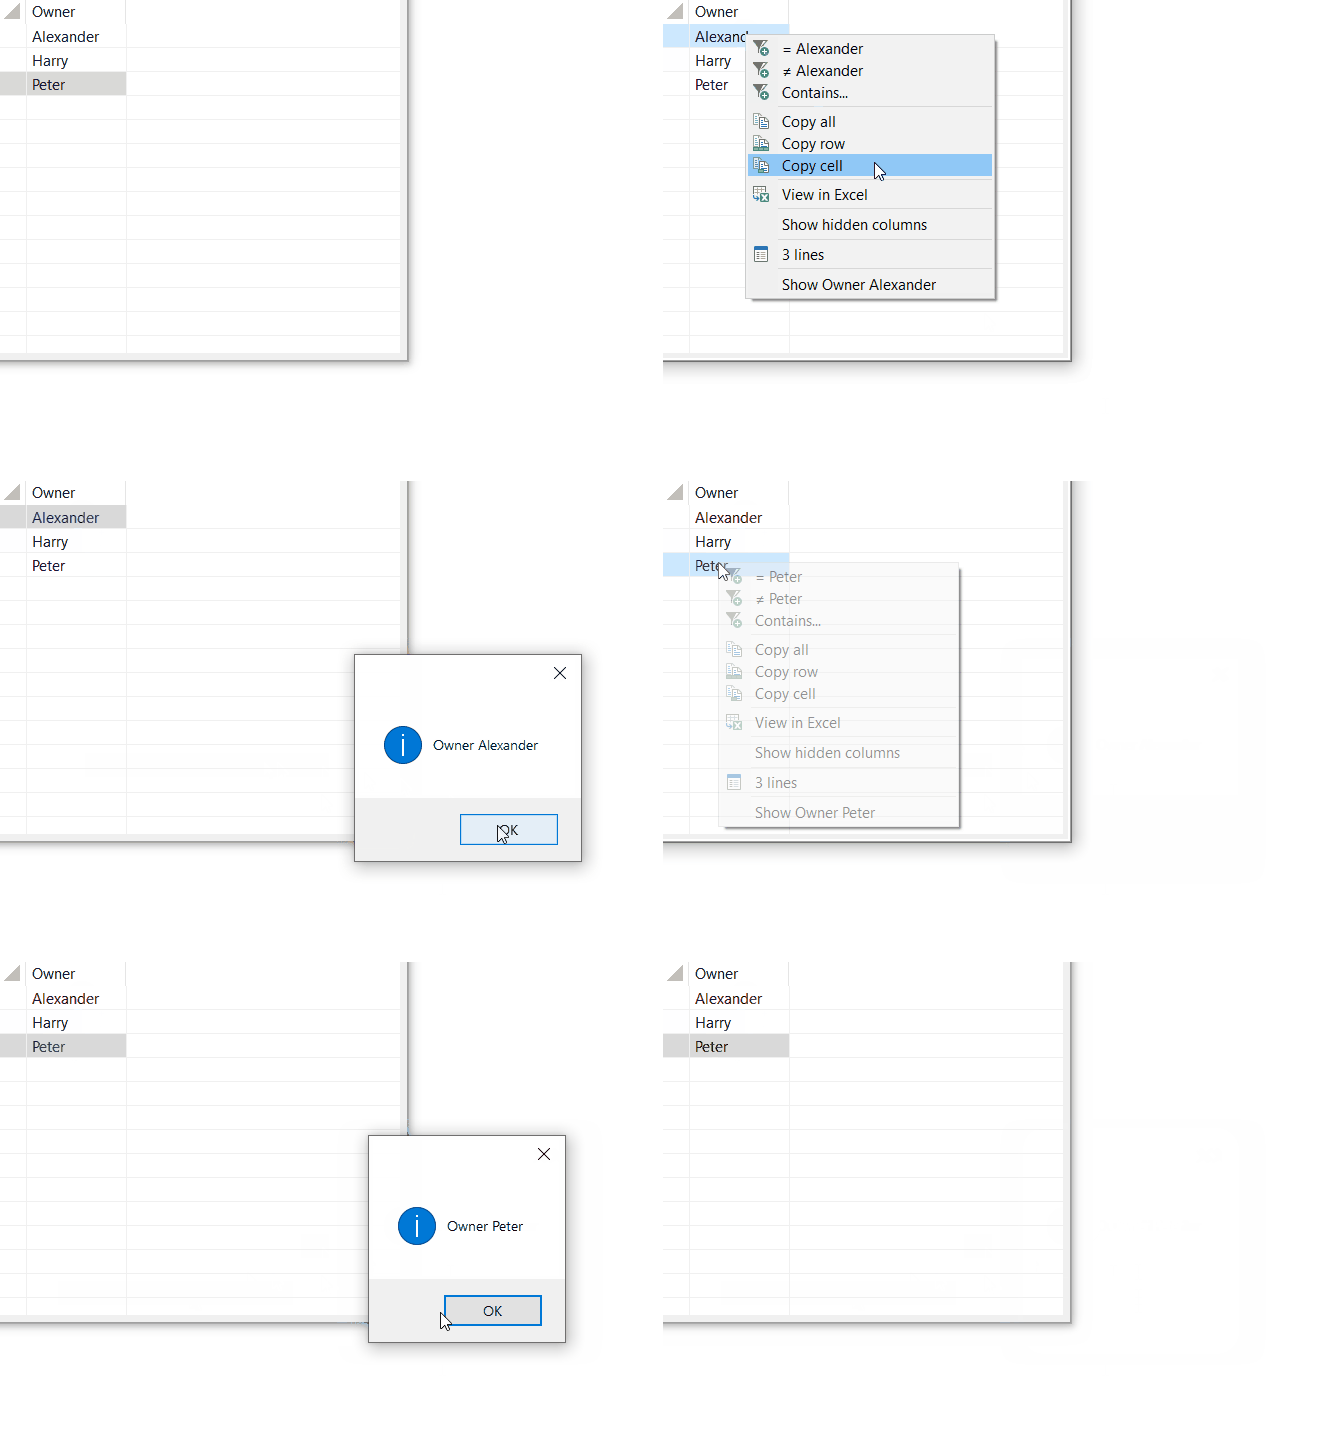
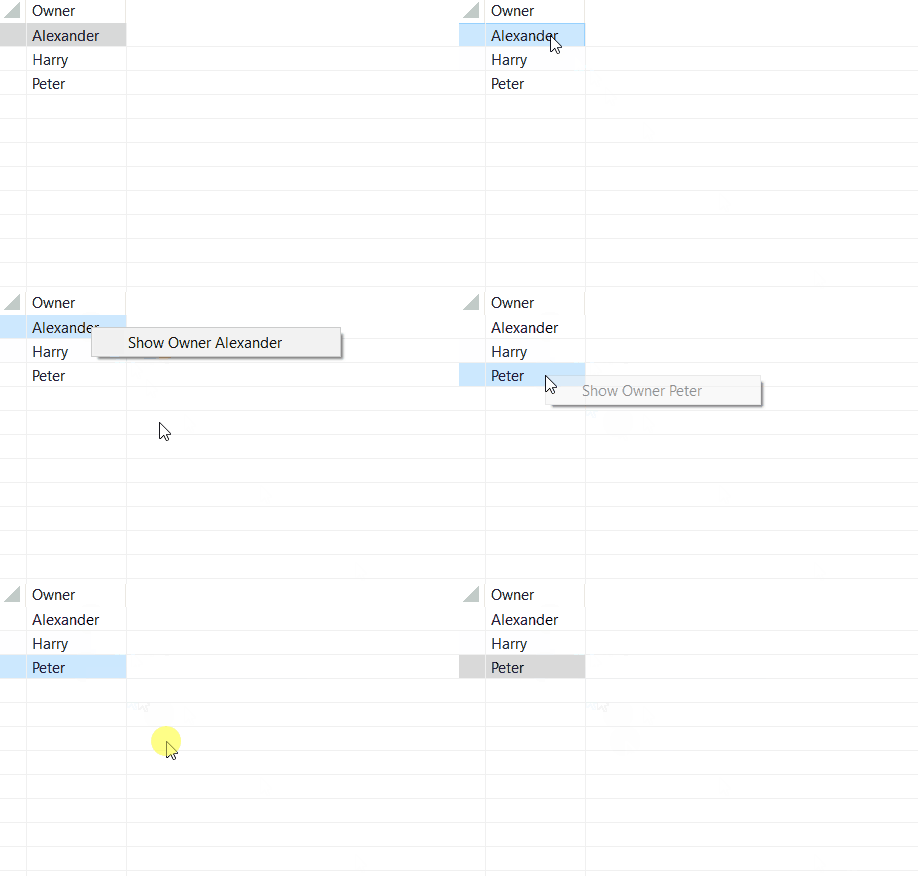
addContextMenuHandler(Consumer<ContextMenuArgs<T>> handler)- registers a handler for context menu events. The handler receives access to the menu, the clicked item, and the column information
table.addContextMenuHandler(args -> {
    Menu menu = args.menu();
    Car car = args.item();
    String columnName = args.columnName();

    MenuUtils.addCommandMenuItem(menu, "Show " + columnName, () -> {
        	MessageBox messageBox = new MessageBox(parent.getShell(), 1 << 1);
			messageBox.setMessage(columnName);
			messageBox.open();
    });
});
-
removeContextMenuHandler(Consumer<ContextMenuArgs<T>> handler)- unregisters a previously registered context menu handler -
showDefaultContextMenu(boolean showDefaultContextMenu)- controls whether the default context menu items(copy, export, filter options) are shown, true by default
table.showDefaultContextMenu(false);
2.5. Sorting
-
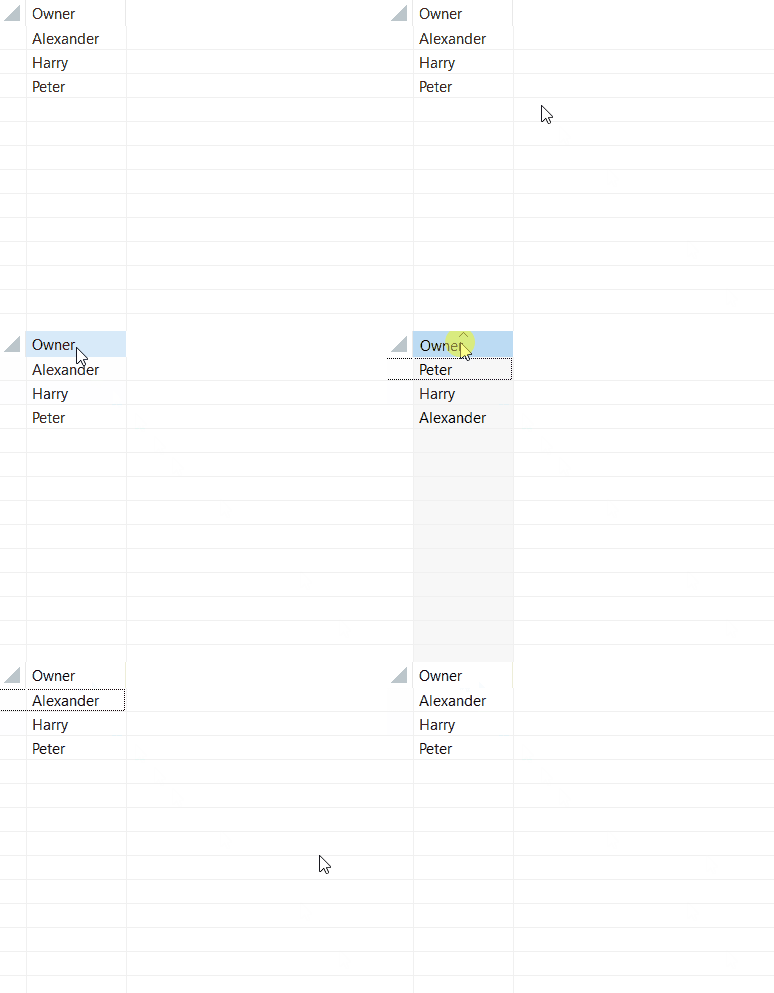
showDefaultContextMenu(boolean setSortingAllowed(boolean isSortingAllowed))- enables or disables column sorting by clicking on column headers, true by default
table.setSortingAllowed(true);
2.6. Filtering
-
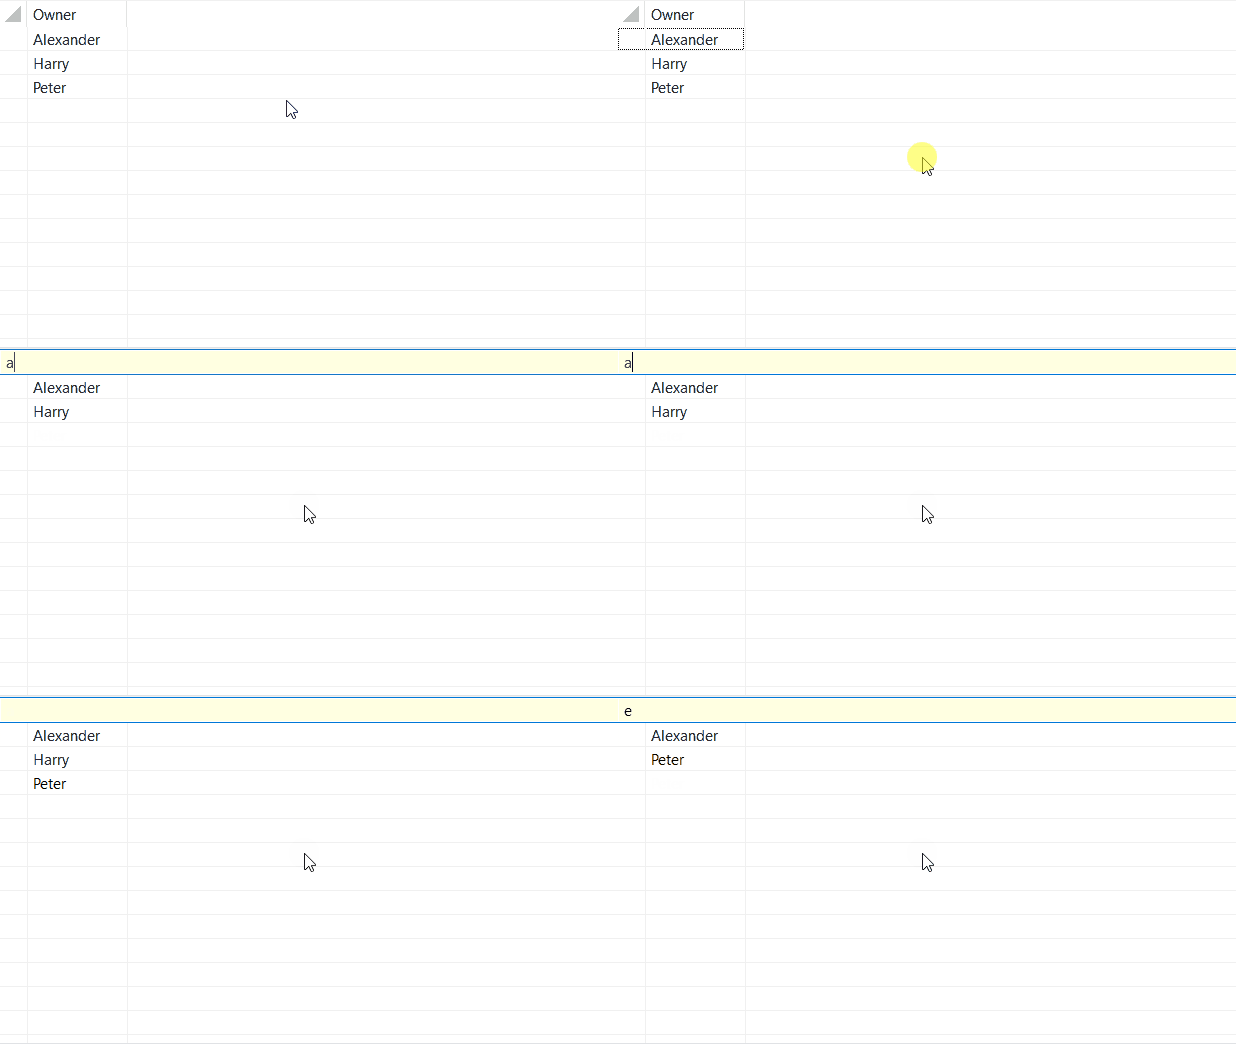
setQuickFilterAllowed(boolean isQuickFilterAllowed)- allows users to filter the table by simply typing letters or digits, without needing to open a context menu. When a key is pressed, a small popup dialog appears, and as the user continues typing, the table dynamically shows only those rows where any visible column contains the entered substring (case-insensitive), false by default
table.setQuickFilterAllowed(true);
3. Adding columns
Table columns are created by calling the column() method.
3.1. Column with format
The format() method accepts a function that converts objects to strings, defaulting to toString(). Sometimes data can be null, you can use nullValueText() to specify what to display for empty values, empty string by default
table
  .column(Car::owner)
  .name("Owner")
  .width(100)
  .nullValueText("— no name —")        // text for null values
  .format(owner -> owner.getName())    // format depends on the value (owner) only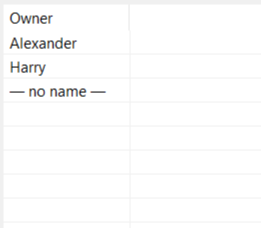
Different format() signatures:
.format("Owner") // all cells display the same static text string(Owner).format((car, owner) -> car.number() + " " + owner.getName()) // format depends on row(car) and value(owner)3.2. Column with color
The backgroundColor() method controls the background color displayed in each cell of the column
table
  .column(Car::color)
  .name("Color")
  .width(100)
  .format("")                              // hide text
  .backgroundColor(car -> car.color()); // color depends on the row (car)
Different backgroundColor() signature:
.backgroundColor(Color.RED) // all cells show the same color3.3. Column with font and font color
The font() and fontColor() methods controls the font and font color displayed in each cell of the column
Font font1 = new Font(parent.getDisplay(), "Arial", 7, 0);
Font font2 = new Font(parent.getDisplay(), "Times New Roman", 14, 2);
table
  .column(Car::owner)
  .name("Owner")
  .width(100)
  .format(Person::getName)
  .font((car, owner) -> owner.getAge() > 50 ? font1 : font2)         // font depends on row(car) and value(owner)
  .fontColor(car -> car.number() % 2 == 0 ? Color.RED : Color.BLUE); // font color depends on row(car)
Different font() signatures:
.font(font1) // all cells show the same font.font(car -> {}) // font depends on row(car)Different fontColor() signatures:
.fontColor(Color.BLUE) // all cells show the same font color.fontColor((car, owner) -> {}) // font color depends on row(car) and value(owner)3.4. Column with histogram
The pseudoHistogramColor() method adds a histogram bars in a column to improve the visualization of numerical data.
table
  .column(car -> car.owner().getAge())
  .name("Owner age")
  .width(100)
  .pseudoHistogramColor((car, age) -> age % 2 == 0 ? Color.GREEN : Color.YELLOW); // assign pseudohistogram color with function defining color depending on number value
Different pseudoHistogramColor() signatures:
.pseudoHistogramColor(Color.YELLOW) // all cells show the same color.pseudoHistogramColor(car -> {}) // pseudoHistogram color depends on the value (car)3.5. Column with icon
Enhance cells by adding dynamic icons using the Image class. You can make the icon conditional based on the cell’s value.
private final Image saveImage = new Image( Display.getDefault(), getClass().getClassLoader().getResourceAsStream( "icons/save_edit.png" ) );
private final Image homeImage = new Image( Display.getDefault(), getClass().getClassLoader().getResourceAsStream( "icons/home.png" ) );
//	...

table
  .column(Car::number)
  .name("Number")
  .width(100)
  .icon((car, number) -> number > 100 ? homeImage : saveImage);  // assign cell icon depending on car's number
Different icon() signatures:
.icon(homeImage) // all cells show the same icon.icon(car -> {}) // icon depends on the value (car)3.6. Column with header tooltip
Sometimes require additional explanation. Use tooltip() to add a hint that appears on hover
table
	.column(Car::owner)
	.name("Owner")
	.width(150)
	.format(Person::getName)
	.tooltip("Additional information about the owner"); // tooltip for column header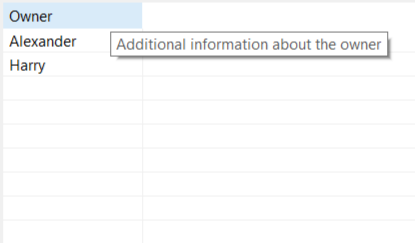
3.7. Column with header icon
Add an icon to the column header using headerIcon(). This is useful for visual branding or indicating column type
private final Image homeImage = new Image( Display.getDefault(), getClass().getClassLoader().getResourceAsStream( "icons/home.png" ) );
//	...
table
	.column(Car::owner)
	.name("Owner")
	.width(150)
	.format(Person::getName)
	.headerIcon(homeImage);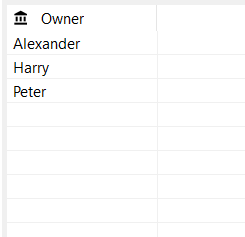
3.8. Moving columns (user reordering)
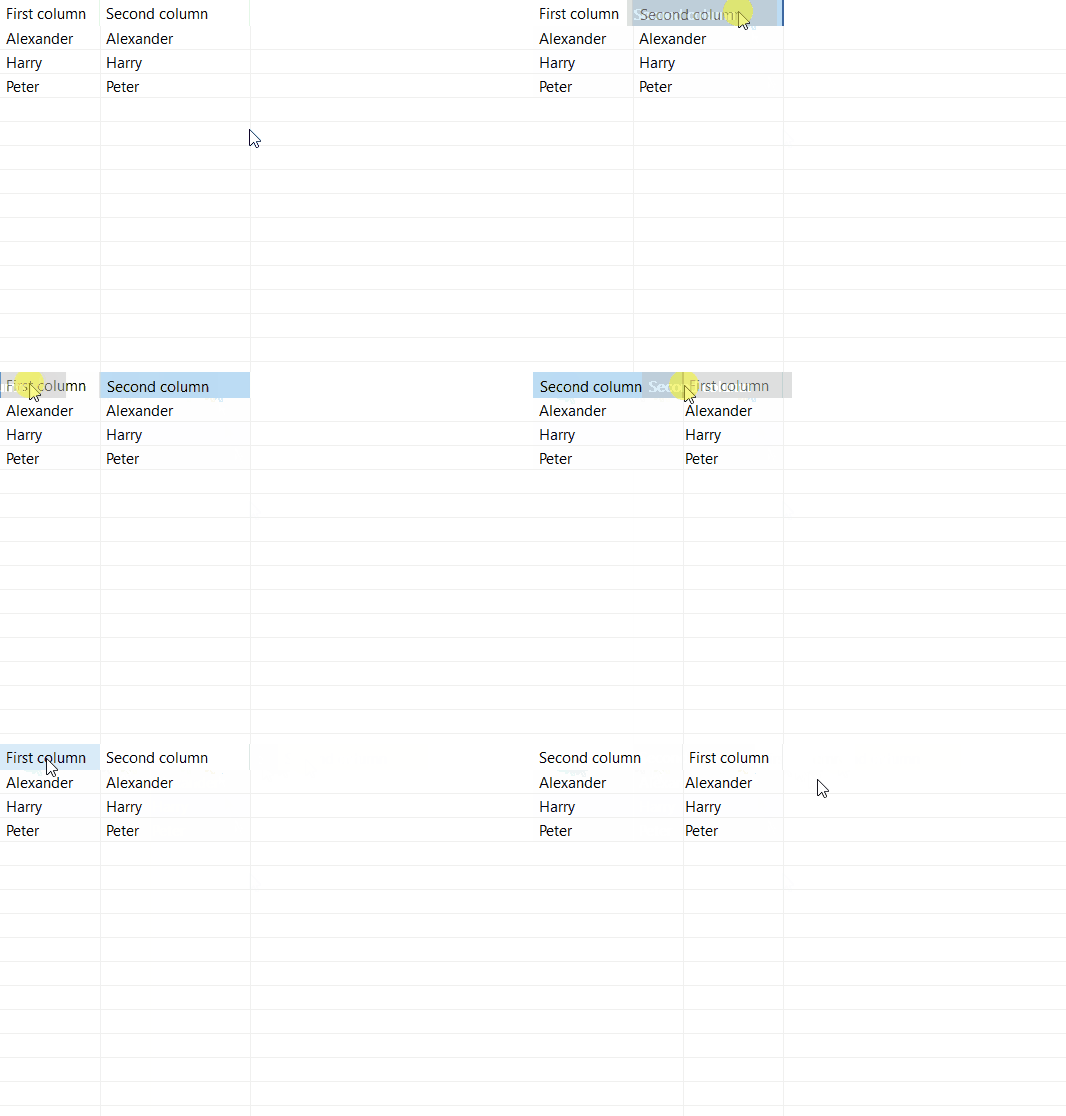
By default, columns have a fixed position. Set moveable(true) to allow users to reorder columns by dragging headers, false by default.
table
	.column(Car::owner)
	.name("First column")
	.width(100)
	.format(Person::getName)
	.moveable(true);

table
	.column(Car::owner)
	.name("Second column")
	.width(100)
	.format(Person::getName)
	.moveable(true);